November 3, 2026
The Complete Guide to Raising Silkworms at Home
By @getraisingsilkwormshomejournal
Getting Started with Silkworm Care
When I first considered raising silkworms at home, I imagined a complex setup requiring expensive equipment and constant attention. After several successful seasons, I can tell you the reality is far simpler. The process revolves around a single food source: fresh leaves from the mulberry tree, specifically the species Morus alba, which is the only natural diet for Bombyx mori. These caterpillars have been domesticated for thousands of years, and they rely entirely on humans for survival. That means your role is straightforward: provide clean leaves, maintain proper humidity, and keep their environment free of mold and pests.
Before you order your first batch of silkworm eggs, consider where you will find mulberry foliage. A mature mulberry tree can supply enough leaves for a small colony, but you need a steady supply throughout the larval stage, which lasts about four to six weeks. If you live in a climate where mulberry trees are rare, you can use silkworm chow, a prepared food made from mulberry leaf powder, agar, and preservatives. Many indoor breeders rely on chow for convenience, especially during winter or in apartments. I have used both and found that fresh leaves produce slightly larger cocoons, but chow works perfectly well for hobbyists and classroom projects.
Setting Up Your Rearing Space
Indoor breeding requires a clean, well-ventilated area away from direct sunlight and drafts. A spare room, a large cardboard box, or a plastic storage tub works fine. The key is controlling temperature and airflow. Bombyx mori thrive between 72 and 82 degrees Fahrenheit. Below 65 degrees, growth slows; above 90 degrees, the caterpillars may die. I keep a small thermometer near the rearing container and adjust the room temperature as needed.
Silkworm bedding is a simple layer of newspaper or paper towels at the bottom of the container. Change it every day or two to prevent mold and bacterial buildup. As the caterpillars grow, they produce a surprising amount of frass (droppings) and leaf scraps. A daily cleaning routine takes about five minutes but makes a huge difference in survival rates. I use a soft brush to gently move the caterpillars to a fresh container while I discard the old bedding and wipe down the walls.

Egg Hatching and Early Larval Stage
Silkworm eggs arrive as tiny, pinhead-sized dots, often laid on a piece of paper or cloth. Store them in a cool place until you are ready to start. When the mulberry trees leaf out in spring, move the eggs to a warmer spot, around 75 degrees. Egg hatching usually occurs within 10 to 14 days. The newborns are called first-instar larvae, and they are incredibly delicate. Handle them with a soft brush or a feather, never with fingers, because oils and pressure can kill them.
For the first few days, the larvae need the youngest, tenderest mulberry leaves. Chop the leaves into small pieces or provide whole leaves if they are very small. Keep the leaves fresh by storing them in a plastic bag in the refrigerator, but let them warm to room temperature before feeding. I learned the hard way that cold leaves shock the caterpillars and can cause them to stop eating. Leaf storage is simple: wrap them in a damp paper towel inside a sealed bag, and they stay crisp for up to a week. Rinse the leaves under cool water before feeding to remove dust and any pesticide residue.
Moulting and Growth
The silkworm life cycle includes several moulting events, where the caterpillar sheds its skin to grow larger. You will notice the larvae stop eating for about 24 hours before each molt. Their heads lift, and they remain still. Do not disturb them during this period. After the molt, they resume feeding with renewed appetite. The larval stage includes four molts, dividing the growth into five instars. By the fifth instar, the caterpillars are about three inches long, plump, and voracious. They eat constantly and produce a steady stream of frass.
Moulting is a vulnerable time. The new skin is soft, and the caterpillar can be easily injured. Keep the bedding dry and avoid moving them until the molt is complete. I once lost a whole tray of fourth-instar caterpillars because I changed the bedding too soon after a molt and accidentally crushed their fresh skin. Now I wait until I see them eating again before I clean the container.
Building the Cocoon
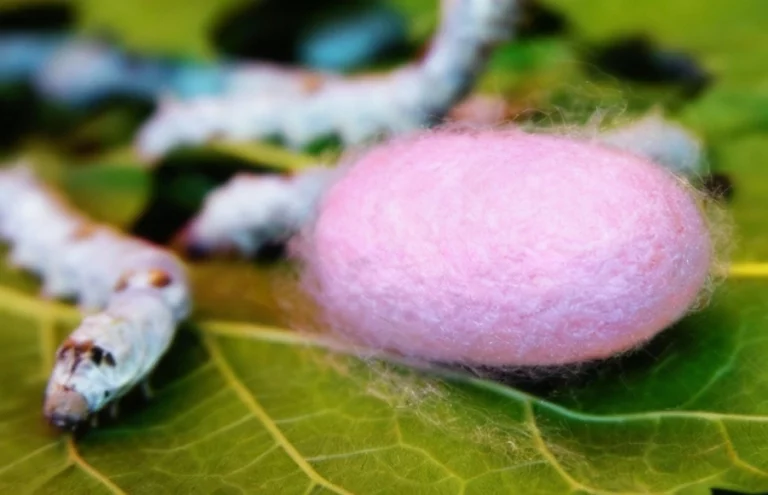
After the final molt, the caterpillar enters a wandering stage. It stops eating and searches for a place to spin its cocoon. This is the moment you have been waiting for. Provide a structure for them to attach to: a cardboard egg carton, a bundle of twigs, or a special silkworm rack sold by sericulture suppliers. The caterpillar will spin a single continuous silk fiber around itself, forming a cocoon that protects the pupa inside.
The spinning process takes about three days. Once the cocoon is complete, the caterpillar transforms into a pupa inside. This stage lasts roughly two weeks. If you want to harvest the silk fiber, you must boil the cocoon before the adult moth emerges, because the moth secretes an enzyme that breaks the silk filament and ruins its continuity. For hobbyists who want to complete the life cycle, simply let the moth emerge naturally. Cocoon harvesting is straightforward: cut open the cocoon with scissors to remove the pupa if you plan to use the silk or let it be if you want to breed the next generation.

Adult Moths and Egg Laying
The adult moth emerges from the cocoon after about 14 days. Bombyx mori moths cannot fly and rarely move far. They mate within hours of emerging. The female lays several hundred tiny eggs over the next 24 to 48 hours. After laying, both moths die within a week. The eggs can be stored in a cool, dry place until the next season, or you can refrigerate them to delay hatching.
Hand-rearing moths is simple: place them on a paper towel or a piece of cloth in a shallow container. The female will deposit eggs directly onto the surface. Keep the eggs at room temperature if you plan to hatch them soon, or store them in the refrigerator at about 40 degrees for up to six months. I refrigerate a portion of my eggs each year to stagger my rearing cycles and have silkworms available at different times.
Common Problems and Solutions
Silkworm diseases are the biggest threat to a home colony. The most common is flacherie, a bacterial infection that causes the caterpillar to become limp and dark. It spreads through contaminated leaves or bedding. Prevention is the best cure: use clean leaves, remove sick caterpillars immediately, and keep the rearing area dry. Another disease is grasserie, caused by a virus that makes the caterpillar swell and burst. Both diseases are more likely in overcrowded conditions. Keep the container spacious enough that the caterpillars do not pile on top of each other.
Mold is another enemy. High humidity combined with leftover leaf scraps creates a perfect environment for fungal growth. I add ventilation holes to my containers and avoid overfeeding. If you see mold on the bedding, remove the affected area and replace it with fresh newspaper. You can also sprinkle a thin layer of diatomaceous earth on the bedding to absorb moisture, but keep it away from the caterpillars' food.
Why Raising Silkworms at Home Is Rewarding
After a few cycles, raising silkworms at home becomes a relaxing routine. You learn to read the subtle signs of your caterpillars: the way they lift their heads before a molt, the frantic searching just before spinning, the quiet stillness of a pupa. It is a window into a life cycle that has been intertwined with human culture for over five thousand years. The practice of sericulture originated in China and spread along trade routes, shaping economies and fashion. By keeping a small colony, you participate in that ancient tradition, even if your silk never leaves the house.
If you plan to work with the silk, you can experiment with reeling the filament from a single cocoon or carding the fluff for spinning. Many hobbyists collect the empty cocoons for craft projects, using them in jewelry or small decorations. The silk fiber itself is incredibly strong and lustrous, and handling it gives you a deeper appreciation for the labor behind every silk garment. But even if you never use the silk, the process of watching the caterpillars grow, spin, and transform is deeply satisfying.
Final Thoughts
Whether you are a teacher looking for a classroom project, a parent wanting to share nature with your kids, or simply someone curious about insect care, the journey is straightforward. You need mulberry leaves or chow, a clean container, and a little patience. The entire life cycle, from egg to egg, takes about eight weeks. That is short enough to hold a child's attention and long enough to see real change. I have found that the quiet moments spent watching the caterpillars eat and grow are meditative. There is a rhythm to it: feed, clean, observe, repeat. And when the first moth emerges, you feel a small pride in having helped it along.
For anyone considering this hobby, I recommend starting with a small batch of eggs, maybe fifty or a hundred, and scaling up once you feel comfortable. The initial investment is minimal: a container, some newspaper, and a reliable source of mulberry leaves. Within a month, you will have a new appreciation for the complexity of insect life and the ancient art of sericulture. Raising silkworms at home is not difficult, but it does require attention to detail. If you can provide fresh food, stable temperatures, and clean bedding, you will succeed. And you will have a story to tell about the tiny creatures that spin gold from green leaves.
❧